
Simple DIY Christmas Gift Ideas Everyone will Love


 (10 votes, average: 1.40 out of 5)
There’s nothing better than when someone open your gift and wow the handmade craft of the gift. Buying Christmas gifts at stores only requires a credit card or some cash, but making a Christmas gift for someone requires much more time and energy to finish it. Things that you wrap into the gift box, are not only the gifts to present.
Now we’re going to show the most popular handmade Christmas gift ideas to save your last minute before Christmas. But the simple making procedures won’t make any one think that they’re made in last minute. If you want to leave more time on the Christmas recipe, read the following gift tips in ten minutes.
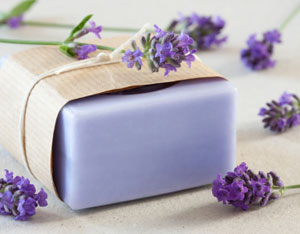
Handmade Lavender Soap
A perfect gift for girl besties, moms, aunts and sisters. When she uses the soap, the aroma of lavender reminds her of your love.
What You Need:
-
One premade soap base

- Scent (lavender oil)
- One soap colorant
- Rubbing alcohol
- One spray bottle for alcohol
- Soap mold (a soft one would be better)
- A microwave-allowed bowl for melted soap
- A spoon
What You Do:
- Break up your soap into cubes and put them into the bowl;
- Put the bowl into your microwave on 40-second intervals until soap is totally melted;
- Take out the bowl and add soap colorant and scent, then stir them well with a spoon;
- Pour the bowl of mixture into your mold;
- When it’s hardened, spritz the rubbing alcohol with your spray bottle on the top of your soap, to remove all air bubbles;
- Remove the soap from molds and wrap up pretty.
*Note:
If your soap becomes too thick to pour nicely into your mold you can quickly re-melt it again in your microwave.
For soaps of other scents, just replace the lavender scent with the scents your gift receiver may like.
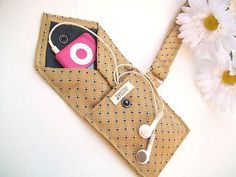
DIY Phone Case Made of a Tie
Don’t know how to deal with the old ties neglected in the corner of your man’s wardrobe? The following simple steps can give them new lives by making them decent gifts for your dad, husband, boyfriend and brother.
What You Need:
-
One tie
- A phone (its size must be similar to the gift receiver’s phone)
- Scissors
- Stick pins
- Hot glue gun/ glue pen
- Sewing machine or needle and thread
- Self-adhering Velcro
What You Do:
- Place the tie on your work surface, and carefully remove the center seam from the back with sharp scissors.
- Gently slide the phone into the open end, and use some stick pins to mark where the base of the phone case should be. (Leave more than half an inch to create a hem)
- Cut away the end of the tie, and remove the stick pin.
- Flip the tie inside out, and hold together at the base with a few pins. Then sew the seam with the help of a sewing machine or needles and thread.
- Finish things off with a squares of self-adhering Velcro.
- Try your phone in it again and done.
*Note: Finishing the seam in step 4 may be tough for someone, therefore a multifunctional sewing machine can offer great help, which can make superior seam with less time and effort.
DIY Painted Mug
Suppose the one you love holding a mug with patterns that only you two know the meaning. Even in a brutally hot summer, some cool beverage inside your mug can make him/her forget the hotness.
What You Need: 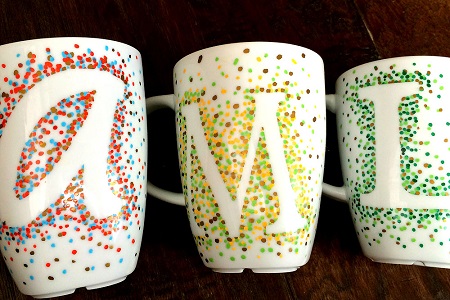
- One mug (plain on the surface)
- Oil-based paint pens
- Scrapbook stickers
- Rubbing alcohol
- Oven
What You Do:
- Pick the scrapbook sticker you choose and stick it on your mug. For example, your friend’s last name or some patterns which can win gift receivers’ favor. Make sure the sticker is in the right place.
- Use the oil-based paint pens to make dots all around the scrapbook stickers. Add multiple colors you like to create pretty dot patterns. If you mess up, wipe it away with some rubbing alcohol.
- After you finish the pattern design and it’s dry, carefully peel off the scrapbook sticker to reveal your design.
- Turn on your oven to 350F, put your mug inside and bake it for 30 minutes.
- 30 minutes later, turn off the oven and let the mugs cool down for a few hours.
- Wrap it pretty and wait for the surprised face.
*Note: Patterns won’t be washed away after using the oil-based paint pens and baking for 30 minutes.
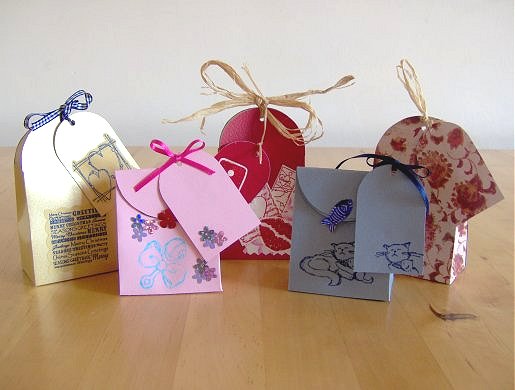
Gift Wrapping Tips to Upgrade Your Inexpensive Gift
- For Items with Various Shapes and Designs, Packaging Methods are Different.
When you plan to present small-sized gifts, like perfume bottles and nail polishers which have no boxes for protection. The best solution is wrapping them with bubbles and tissue paper first, then put them into a square box or a delicate gift bag.
For medium-sized items, there’s an economical option, broken-down shipping boxes. Stick some shining and stylish wrapping paper onto the surface, no one would know it’s a used shipping box.
Soft gifts need more attention to give a wrapping. You’d better wrap it like a candy with a square piece of paper or cardboard.
- Hide the Price While Wrapping Your Gift.
It’s rude to show the price to gift receivers in presenting your gift. But if your gift is handmade at home, there won’t be this concern during gift wrapping.
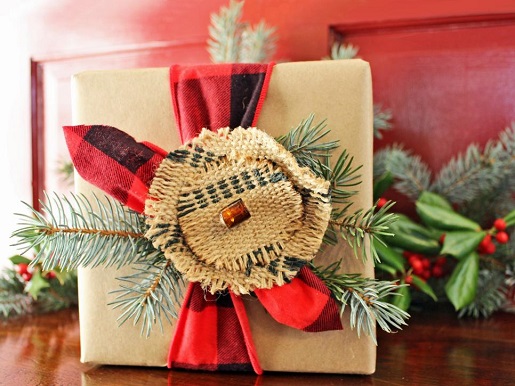
- Add Some Vintage Element or Christmas Decor on the Gift Box.
Pine twigs, colorful bell balls, and wrapping paper with deer pattern are great ideas on gift wrapping. If you have no time to shop for the wrapping material, a piece of craft paper matching with a red flannel ribbon can also warm up others’ eyes. Who cares whether the red flannel ribbon is made of your husband’s discarded shirt?

-
-
 Genki VS Powerfit : Whole Body Vibration Machine Buying Guides
10 years ago
Genki VS Powerfit : Whole Body Vibration Machine Buying Guides
10 years ago
-
 How Do Air Fryers Work? Maxkon Airfryer VS Philips Air Fryer Reviews
9 years ago
How Do Air Fryers Work? Maxkon Airfryer VS Philips Air Fryer Reviews
9 years ago
-
 Easy and Healthy Blender Recipe Top 6
10 years ago
Easy and Healthy Blender Recipe Top 6
10 years ago
-
 Top 10 Popular Easter Bonnet Ideas | How to DIY Easter Hats for Bonnet Parades
3 years ago
Top 10 Popular Easter Bonnet Ideas | How to DIY Easter Hats for Bonnet Parades
3 years ago
-
 Top Five Handy Pick-ups to Fulfill Your Home Gym
10 years ago
Top Five Handy Pick-ups to Fulfill Your Home Gym
10 years ago
-
 Keep Food Always Fresh: Maxkon VS Sunbeam Vacuum Sealer Review Australia
9 years ago
Keep Food Always Fresh: Maxkon VS Sunbeam Vacuum Sealer Review Australia
9 years ago
-
 Best Cooling Fan Reviews Maxkon VS Dyson 2021 | Turn Your Home Into A Summery Oasis
5 years ago
Best Cooling Fan Reviews Maxkon VS Dyson 2021 | Turn Your Home Into A Summery Oasis
5 years ago
-
 Winter Checklist: Electric Blanket, Comforter and Heated Towel Rail To Help You Through Australian Winter
9 years ago
Winter Checklist: Electric Blanket, Comforter and Heated Towel Rail To Help You Through Australian Winter
9 years ago
-
 Which Do You Prefer to Stay Cool with This Summer: a Fan, an Air Conditioner or an Ice Maker?
8 years ago
Which Do You Prefer to Stay Cool with This Summer: a Fan, an Air Conditioner or an Ice Maker?
8 years ago
-
 Three Must-Try Home Gym Workouts in New Year Workout Plan
10 years ago
Three Must-Try Home Gym Workouts in New Year Workout Plan
10 years ago
-